


 exam: Ultimate Guide")


There are several ways to install and use Kali Linux, first we need to understand how to install it and where we want to run our Kali installation.
In our case we will install Kali on PC via USB Flash Drive, on virtual environment like VMWare and VirtualBox.
The steps are nearly the same for all 3 types of installation. First of all need to get Kali Linux ISO image. Download Kali Linux you can from official website: Kali.org
On next step, after we have downloaded required type of ISO we need to:
- Setup our virtual environment to launch ISO
- Or create bootable USB drive with Kali image to install it directly on PC
Creating a Bootable Kali USB Drive on Windows
You need to download Win32 Disk Imager and do following steps:
- Plug your USB drive into an available USB port on your Windows PC, note which drive designator (e.g. “F:\”) it uses once it mounts, and launch the Win32 Disk Imager software you downloaded.
- Choose the Kali Linux ISO file to be imaged and verify that the USB drive to be overwritten is the correct one. Click the “Write” button.
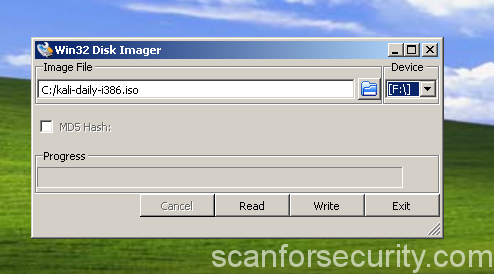
- Once the imaging is complete, safely eject the USB drive from the Windows machine. You can now use the USB device to boot into Kali Linux.
Than just reboot your PC and set up booting from removable device with help of BIOS.
Other part of installation of Kali on PC is the same as for virtual environment.
Here we adding good video of how to install Kali on VMWare Workstation, same method can be applied for VirtualBox


