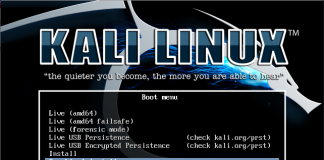
Today we going to learn some basic stuff with help of videos about Kali Linux and see which tools may help us on our reconnaissance and exploitation steps.
Reconnaissance & scans with nmap
One of the very first steps in any network reconnaissance mission is to reduce a (sometimes huge) set of IP ranges into a list of active or interesting hosts. Scanning every port of every single IP address is slow and usually unnecessary. Of course what makes a host interesting depends greatly on the scan purposes.
Network administrators may only be interested in hosts running a certain service, while security auditors may care about every single device with an IP address. An administrator may be comfortable using just an ICMP ping to locate hosts on his internal network, while an external penetration tester may use a diverse set of dozens of probes in an attempt to evade firewall restrictions.
Because host discovery needs are so diverse, Nmap offers a wide variety of options for customizing the techniques used. Host discovery is sometimes called ping scan, but it goes well beyond the simple ICMP echo request packets associated with the ubiquitous ping tool. Users can skip the ping step entirely with a list scan (-sL) or by disabling ping (-Pn), or engage the network with arbitrary combinations of multi-port TCP SYN/ACK, UDP, SCTP INIT and ICMP probes.
The goal of these probes is to solicit responses which demonstrate that an IP address is actually active (is being used by a host or network device). On many networks, only a small percentage of IP addresses are active at any given time. This is particularly common with private address space such as 10.0.0.0/8. That network has 16 million IPs, but I have seen it used by companies with less than a thousand machines. Host discovery can find those machines in a sparsely allocated sea of IP addresses.
Exploitation
As our second move we going to gather all the data about our findings and try to execute attacks on some targets. As example we will be using metasploit and our target will be Windows PC machine.
The Metasploit Project is a computer security project that provides information about security vulnerabilities and aids in penetration testing and IDS signature development.
Its best-known sub-project is the open source Metasploit Framework, a tool for developing and executing exploit code against a remote target machine. Other important sub-projects include the Opcode Database, shellcode archive and related research.
The Metasploit Project is well known for its anti-forensic and evasion tools, some of which are built into the Metasploit Framework.
How to extend our scanning capabilities with Nessus
This aint the last step of our “hacking” activity, but why not try to automated some stuff? Here we will see how to use Nessus together with Metasploit in Kali Linux.
What is Nessus ?
Nessus is a proprietary vulnerability scanner developed by Tenable Network Security. It is free of charge for personal use in a non-enterprise environment.
According to surveys done in 2009 by sectools.org, Nessus is the world’s most popular vulnerability scanner, taking first place in the 2000, 2003, and 2006 security tools survey. Tenable Network Security estimated in 2005 that it was used by over 75,000 organizations worldwide.
3 things you should know about the Nessus
- Network Scanning – With over 28,000 plugins, Nessus has some excellent coverage in terms of vulnerability scanning for your systems and network. When running a network-based scan it is important to tune it appropriately. Look at the different plugin families and enable the ones that you think are most relevant. In addition, review the Advanced options for your scan. If you are performing web application testing, take a look at the Advanced options global variable settings. If speed is not a factor, you can get some awesome results by enabling CGI scanning, experimental plugins and thorough tests. Finally, don’t just look at the high level alerts: some medium and low level alerts can lead to root access!
- Credentialed Scanning – Local Checks – Providing Nessus with credentials enables the scanner to gather considerably more information than a network-based scan, such as information about installed patches. For example, if your target is running CentOS, it will check that it has the latest patches. Running a credentialed scan is the best way to reduce false positives. For UNIX/Linux systems, use SSH with a pre-shared key instead of a password. Then you can use the filtering feature in the Nessus client to distribute nice reports of hosts that are missing patches to your systems administrators.
- Credentialed Scanning – Audit Files – Another useful credentialed Nessus scan is to compare your system settings to known standards. Nessus has checks for several different standards, including CIS benchmarks, PCI, FDCC and the OWASP top ten list. Nothing says security like good ole’ fashioned system hardening and Nessus can help you achieve your system hardening goals with audit file checking. This is particularly useful for systems such as web servers, as Nessus can test the operating system, Apache web server and database settings against pre-determined security standards.


